


Jam-Packed Flavours: Preserve the Taste of the Seasons
Posted by Catrin Hughes on 26th Aug 2025
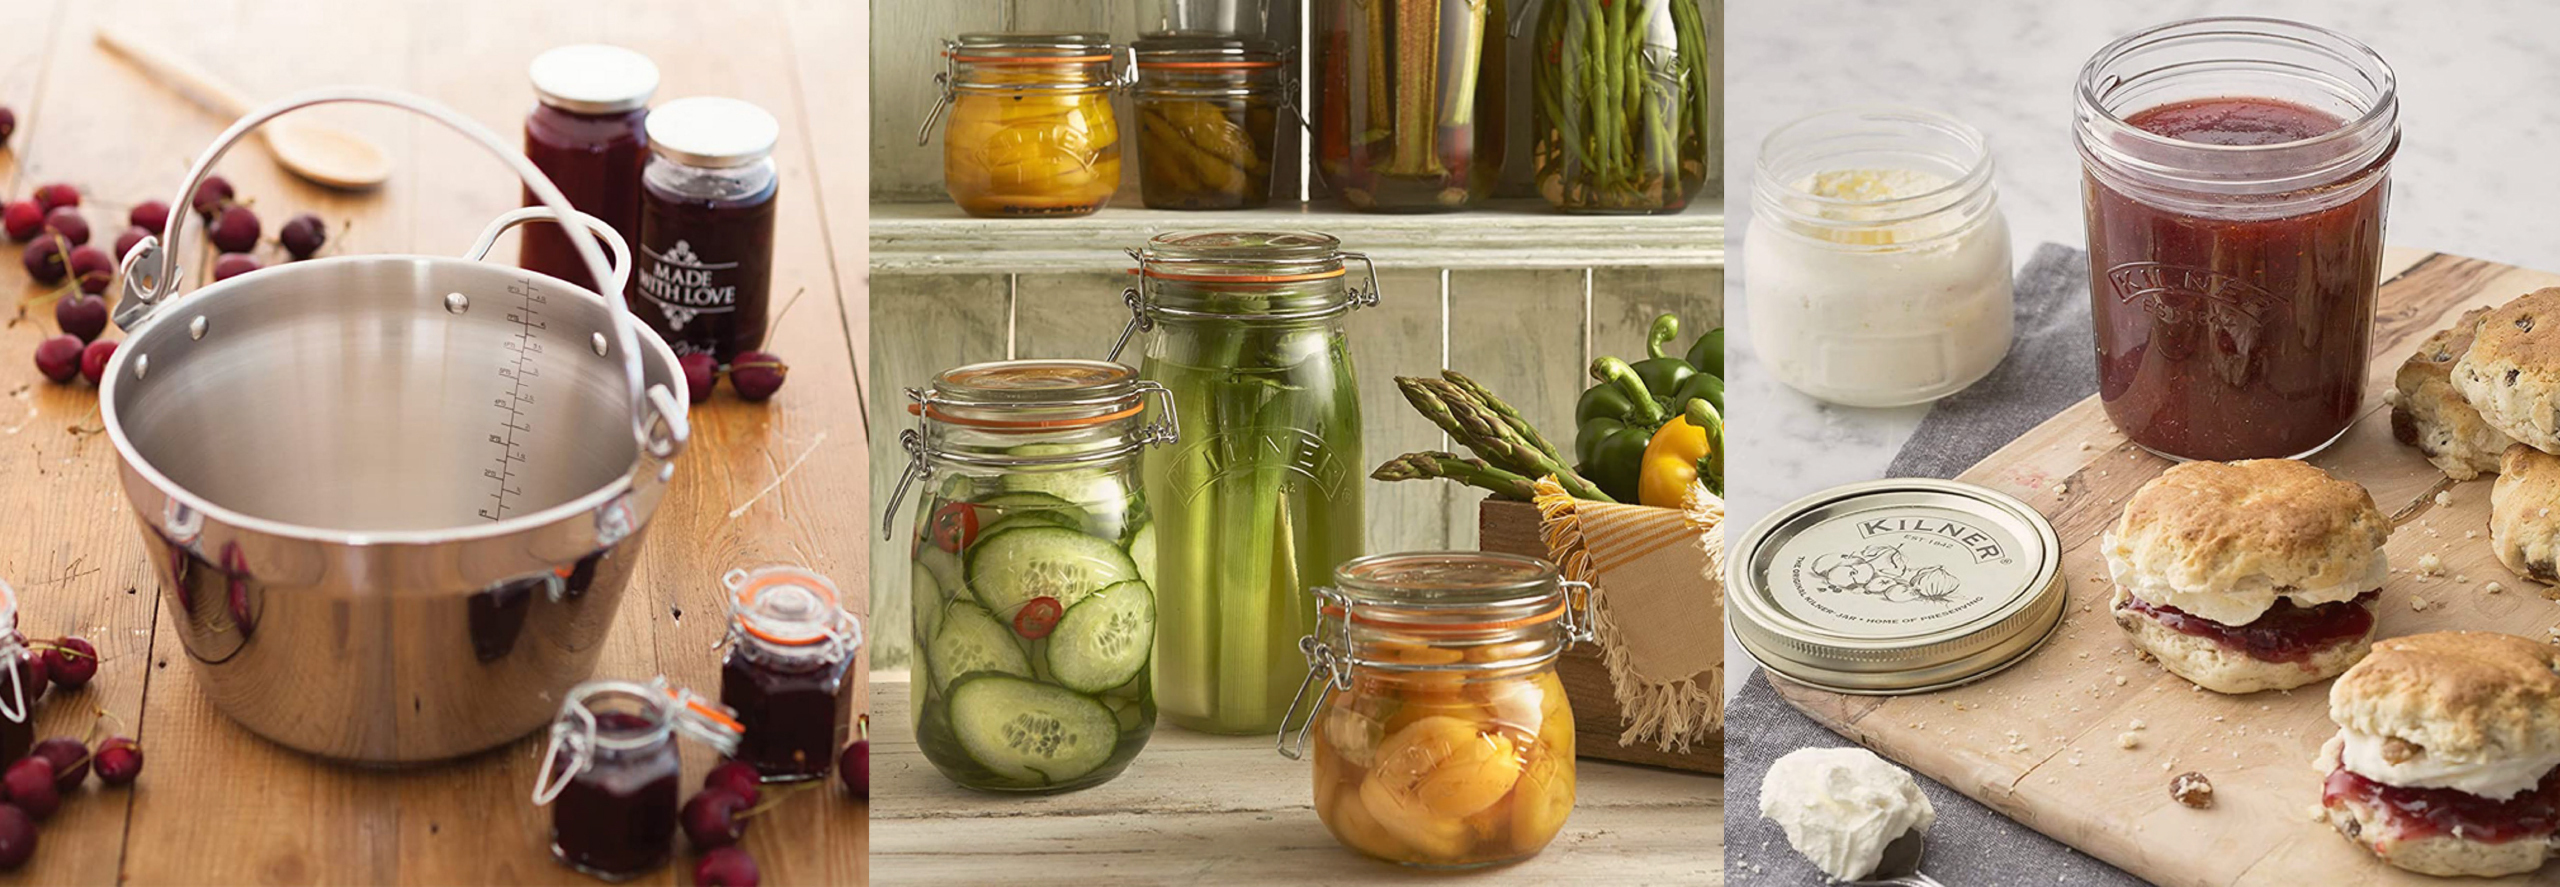
Preserve the Flavour: Your Complete Guide to Jams, Chutneys & Seasonal Delights
As summer transitions into crisp autumn mornings, it’s the perfect time to capture the season’s flavours and enjoy them all year round. Gardens, allotments, and hedgerows have provided a wealth of produce — from juicy strawberries and raspberries to plump blackberries, fragrant plums, and sun-ripened tomatoes. If your kitchen counters are overflowing with fresh fruit and vegetables, now is the ideal moment to preserve your harvest.
Why Preserve Now?
Late summer and early autumn are the best seasons for preserving, as fruits are at their peak in flavour and sweetness. By making your own jams, chutneys, pickles, and sauces, you can enjoy homegrown goodness well into winter while knowing exactly what goes into every jar.
How to Sterilise Jars for Jams & Preserves?
Sterilising jars is essential for keeping your preserves fresh and safe. Here's an easy to follow method:
Step 1 – Inspect Jars for Damage
Before starting the sterilisation process, carefully examine all jars and bottles for any cracks, chips, or breaks. Discard any that are damaged, as they may not seal properly or could shatter during the process.
Step 2 – Wash the Jars
Clean your jars thoroughly in warm, soapy water to remove any dirt or residue.
Rinse well and leave them to air dry.
Step 3 – Prepare the Water Bath
Remove the lids or rubber seals and set them aside. Place a heat-resistant plate upside down in the bottom of your Kilner® Preserving Pan. Position the jars on top of the plate, ensuring they are stable.
Step 4 – Sterilise the Jars
Fill the pan with cold water until the jars are fully submerged. Bring the water to a boil and maintain the maximum temperature for 10 minutes. Once done, turn off the heat and cover the pan to keep the jars warm until you are ready to fill them.
Important: Never attempt to sterilise Kilner bottles or jars by pouring boiling water directly into them, as this could cause them to crack.
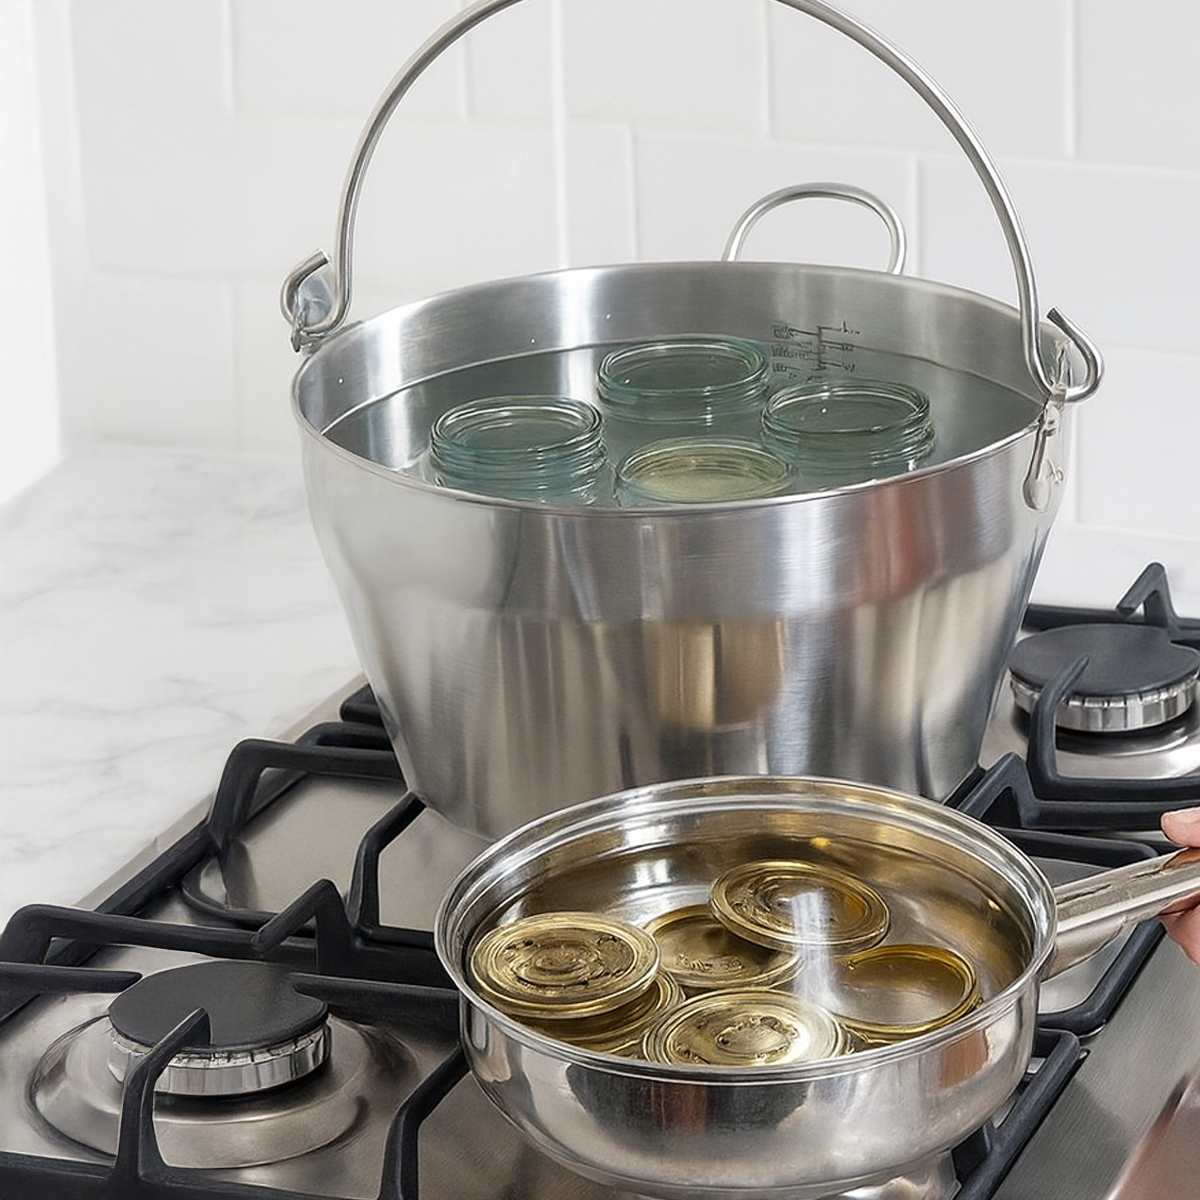
Step 5 – Sterilise the Lids and Seals
Place vacuum-seal lids or rubber seals in a small pan, cover with about 4 inches of cold water, and slowly bring to a simmer at 82°C. Let them heat for 10 minutes, then turn off the heat and leave them covered until needed.
Step 6 – Dry the Jars and Lids
Using sterilised tongs, carefully remove the jars, lids, and seals from the water. Place them on a clean, dry cloth and leave them to air dry completely.
Your jars are now sterilised and ready to be filled!
Making Jam & Preserves: A Quick Guide
Creating your own preserves is simpler than you might think. Follow these tips for the best results:
Tools You’ll Need
Before you begin, gather these essentials to make the process smooth and safe:
Large heavy-based pan – for even heating and preventing burning
Wooden spoon – ideal for stirring without damaging the fruit
Jam thermometer – to check when your jam reaches 105°C
Sterilised jars with lids – for storing your preserves
Ladle or jug – to pour the hot jam easily
Funnel – helps avoid spills when filling jars
1. Choose the Best Fruit
Great jam starts with great fruit. Pick fresh, ripe, and unbruised produce for the richest flavour — underripe fruit can make your jam bland, while overripe fruit can affect the texture. If you’re working with low-pectin fruits like strawberries, cherries, or peaches, pair them with high-pectin fruits like apples, blackcurrants, or gooseberries to help your jam set. Alternatively, you can add preserving sugar, which already contains pectin, for more reliable results.
Tip: Taste your fruit before cooking — if it’s a little tart, add a touch more sugar; if it’s naturally sweet, you can reduce it slightly.
2. Use the Right Sugar
Sugar doesn’t just sweeten your jam — it also helps preserve it. Preserving sugar is ideal for beginners because it contains added pectin, giving you a better chance at achieving a firm set. Before adding sugar to your fruit, warm it gently in the oven (around 120°C) for 10 minutes. This helps it dissolve faster and reduces the risk of crystallisation. Always stir it in slowly to avoid clumps.
Tip: Avoid reducing sugar too much — it plays a big role in helping your jam set and last longer.
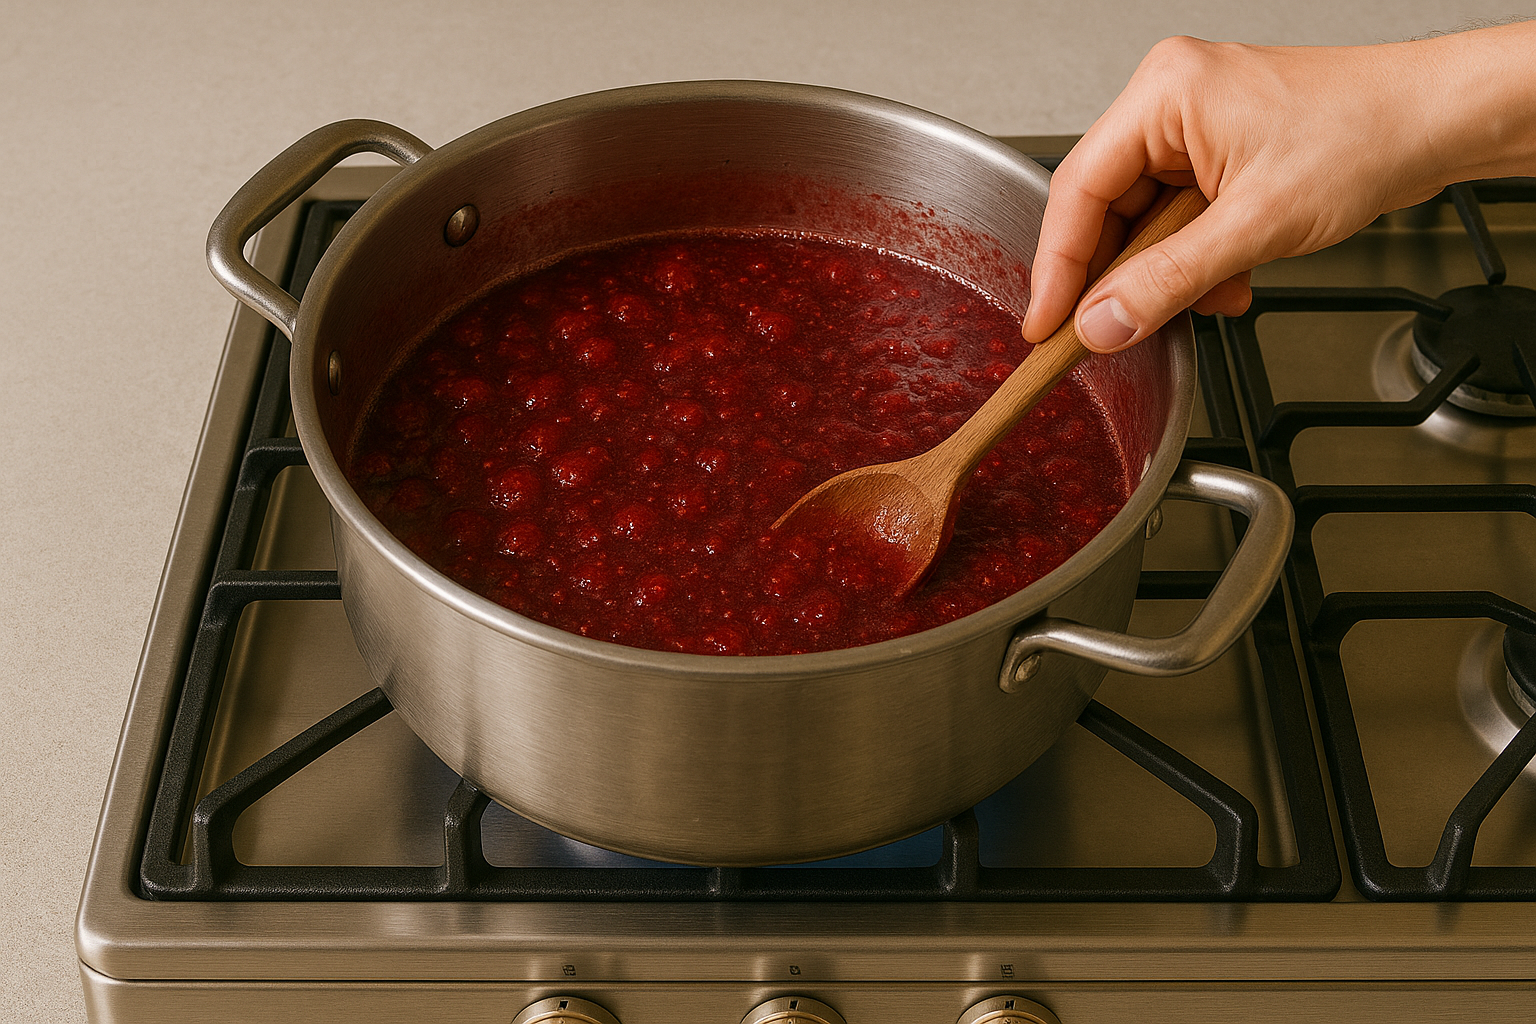
3. Cook to the Correct Temperature
Once your fruit and sugar are combined, gently simmer until the sugar dissolves completely. Stir frequently to prevent sticking or burning. Then, turn up the heat and bring it to a rapid boil — this is when the magic happens! Jam sets at around 105°C, so use a jam thermometer for accuracy. If you don’t have one, use the cold plate test: place a plate in the freezer, drop a little jam on it, and push it with your finger. If it wrinkles, it’s ready.
Tip: Skim off any foam that forms on top for a clearer, smoother jam.
4. Fill and Seal
Sterilising your jars is key to keeping your preserves safe and fresh. Boil them in water or heat them in the oven before filling. Once your jam is ready, carefully ladle it into the hot, sterilised jars, leaving about ½ cm of space at the top to allow for expansion. Wipe the rims clean, place the lids on tightly, and let them cool at room temperature. As they cool, you should hear the satisfying “pop” of the lids sealing properly.
Tip: If a jar doesn’t seal, don’t worry — just store it in the fridge and enjoy it first.
5. Store Properly
Keep your sealed jars in a cool, dark place — a cupboard or pantry works perfectly. Properly sealed jam will last for several months without losing quality. Once opened, refrigerate your jam and aim to finish it within a few weeks for the best taste and texture. Always use a clean spoon to avoid introducing bacteria.
Tip: Label your jars with the date and fruit used — it makes tracking freshness easier and adds a nice homemade touch.
Creative Uses for Bottles & Jars
Bottles aren’t just for jam and preserves — they can be stylish, practical, and endlessly versatile in the kitchen and beyond. Whether you’re gifting something homemade, adding a personal touch to your cooking, or simply finding clever ways to store delicious creations, bottles are the perfect solution. From refreshing drinks to infused oils and even custom cocktail mixes, there are plenty of fun and creative ways to put them to use.


Essential Accessories for Making Preserves
When making preserves, a few essential accessories can make the process easier, safer, and more efficient. Muslin cloth squares are perfect for straining fruit, removing seeds, and achieving smooth textures in jams and jellies. Replacement rubber jar sealing rings are crucial for ensuring an airtight seal on preserving jars, keeping your preserves fresher for longer. A labelling set helps you organize and identify your creations by recording dates, ingredients, and flavours, making it easier to manage your pantry. Finally, a funnel is invaluable for pouring hot jams and chutneys into jars neatly and safely, reducing spills and mess. Together, these accessories help ensure a smooth preserving experience and professional-looking results.
As the seasons change, there’s something truly special about capturing the vibrant tastes of summer and autumn to enjoy all year round. Whether you’re filling your pantry with jars of homemade jam, experimenting with chutneys, or crafting your own infused oils and syrups, preserving is more than just a kitchen skill — it’s a celebration of nature’s bounty. With the right tools, a little patience, and a dash of creativity, you can turn this year’s harvest into lasting memories, one jar at a time. So, gather your favourite fruits, stock up on Kilner jars, and start preserving the flavours you love — because there’s nothing sweeter than opening a jar of homemade goodness when winter days arrive.